Recently, we were in the process of setting up an OAC instance and ran into some problems with our Essbase Service. After opening up a ticket with Oracle, we were asked to provide a log from the server. Remembering that we are on the Cloud, we were instantly stumped on how to obtain the file. After some trial and error, and time spent on the phone with Oracle Support, we are pleased to bring you the easiest way we found to access the server obtain log files.
The first thing is locate your SSH key bundle. In case you have forgotten, this is the zip file you downloaded when you created the service instance in your OAC dashboard. The zip file will contain two files, the public key which is stored on the server and the private key which is what you need to access the server.
Unfortunately, you will find that when you unzip the file, the private key is in an OpenSSH format which is not supported by PuTTy (the SSH utility we will be using in this example). Lucky for us, PuTTy has a converter, which is quite simple to use if you follow our steps below.
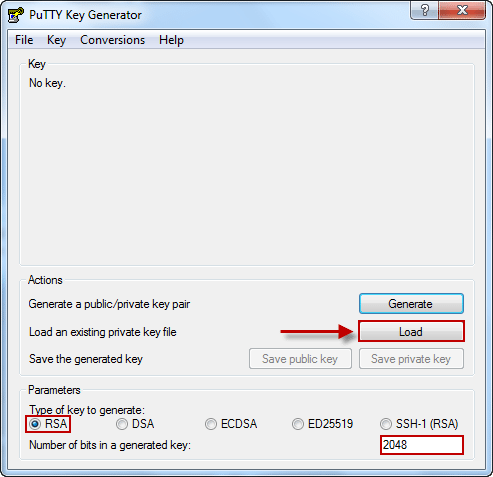
When you download PuTTy, you will see that it also downloads the PuTTy Key Generator, which is what we will use to convert the private key into the correct format. When you open the PuTTy Key Generator, you will select the Load button as shown below. Note that in the parameters section, you need to select the type of key (RSA) and the number of bits generated (2048).
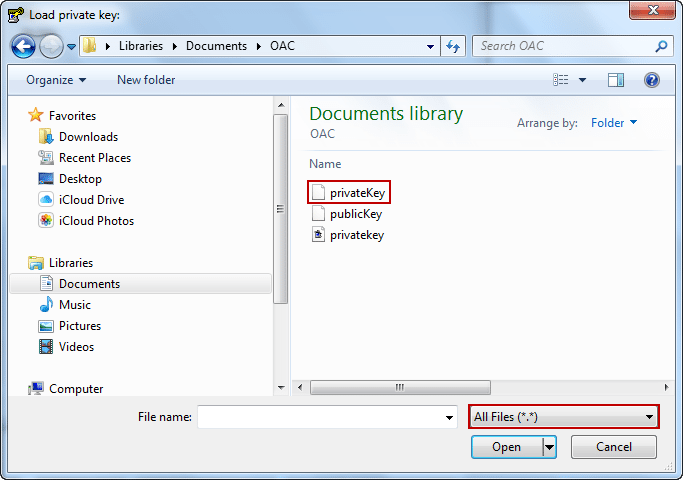
When you click Load, you will be prompted to select a file. You will have to change your file type to All Files in order to choose your privateKey.txt.
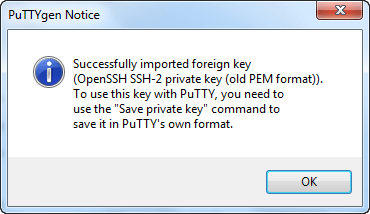
After you have loaded your privateKey.txt you will be notified that it has imported successfully into PuTTy.
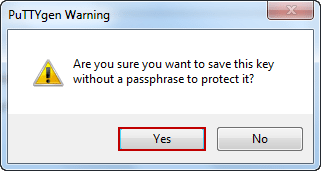
At this point, you will see the newly converted key and have the option to “Save private key”.

PuTTy will confirm that you want to save the key without a passphrase. If you are the only one who will be accessing the key, you probably do not need a passphrase. However, if the key will be used openly, we recommend implementing a passphrase.
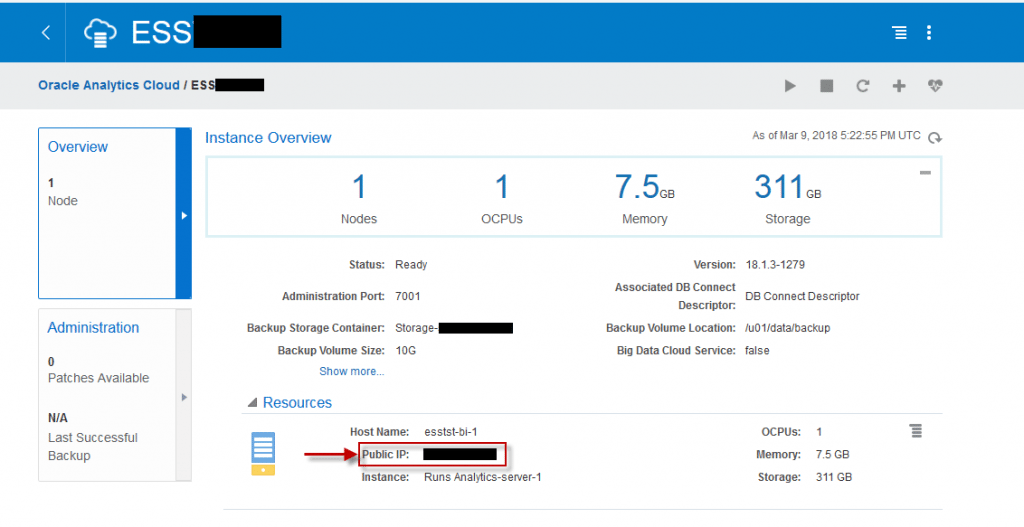
After you have created your key, you will need the IP address of the service you wish to access. You can find this through your OAC dashboard. In the dashboard, you will navigate to your service console and click on the service you are trying to access (we are using our Essbase service). Under the Overview tab on the left, you will see a Resources section where you can find your Public IP.
Next we are going to open up PuTTy. The first screen you will be prompted with is the Session screen. We will enter our service IP (from the OAC dashboard) and port number (22).

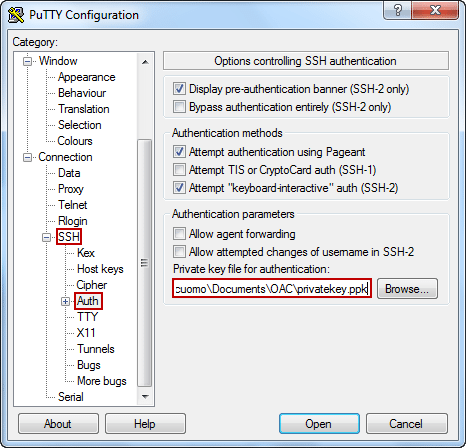
After we have entered that information, we can navigate in the left Category panel to the Auth section found under Connection\SSH. We will need to browse for our .ppk version of the private key that we created earlier.
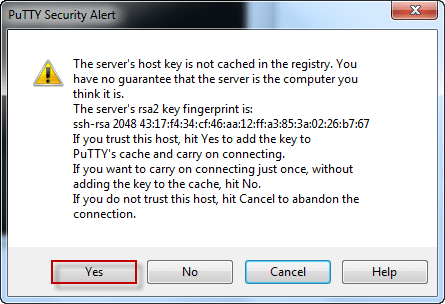
After choosing this file you will be prompted with a security alert to which you can select Yes.
Congratulations! You have now made your way to the server gates. From here, we will be running a series of commands to generate the diagnostics file.
The first few commands shown below are simply to log in, change the user we are working under, and change directories.
Login: opc
Change user: sudo –su oracle
Change Directory: cd /bi/app/public/bin
Next, we ran a list command to show the python script we will be running to generate the diagnostics file.
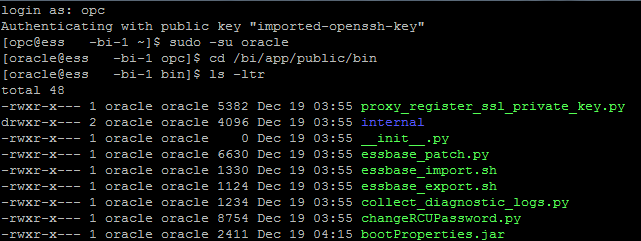
List with more details/: ls -ltr
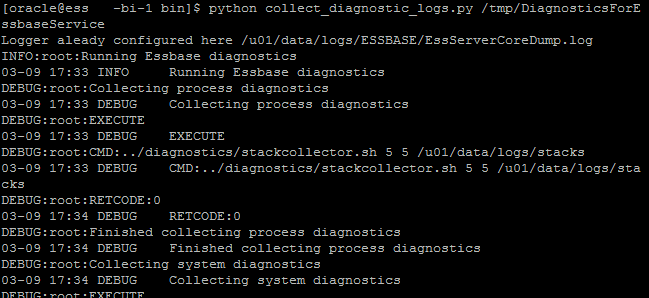
At this point, we are ready to run the command to call the python script. The command calls the script and the directory you wish to send the file to and the name you want to call the file.
Diagnostics Command: python collect_diagnostic_logs.py /tmp/DiagnosticsForEssbaseService
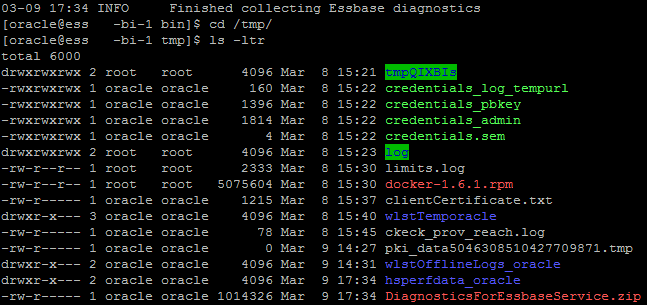
After this finishes running, we can change directories again to verify the file has been generated. By using our ls command again, we can see that the file DiagnosticsForEssbaseService.zip in the tmp folder that now exists. But wait, there is one problem, the file is red and is not provisioned to be extracted.
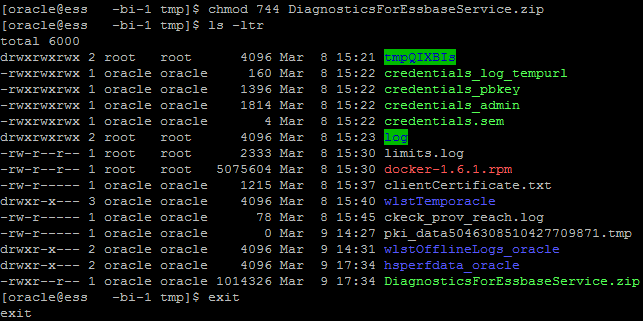
Next, we used the chmod command to alter the provisioning of the file. In this example, we provided master access to the file so there won’t be any issues with extracting the file.
Alter Provisioning: chmod 744 DiagnosticsForEssbaseService.zip
By running the ls command on the tmp folder one more time, we can see that the file has now turned green. At this point we no longer need to use PuTTy and can use the exit command and close out.
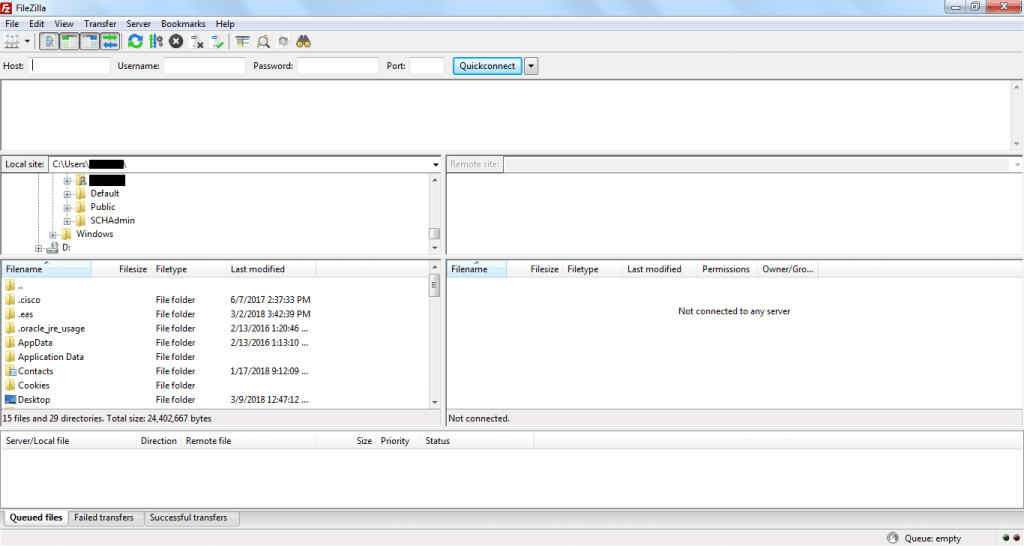
The final stage to this process is extracting that file off the server. This can be achieved through PuTTy as well. Using FileZilla makes it very simple through a nice user interface in order to obtain the file. When you open up FileZilla you will begin with the following screen:
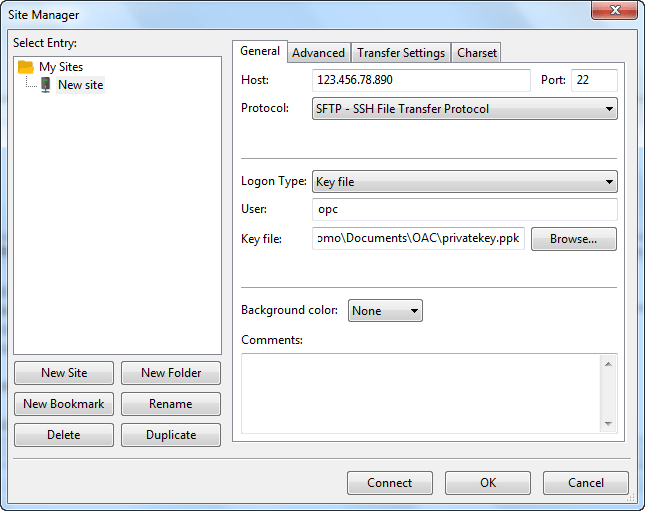
Click File then Site Manager in order to make a connection to our Essbase service. The host is our service IP. The Protocol should be set to SFTP – SSH File Transfer Protocol. Your Logon Type should be Key file. The User should be opc, and the Key file should be your .ppk version of the private key.
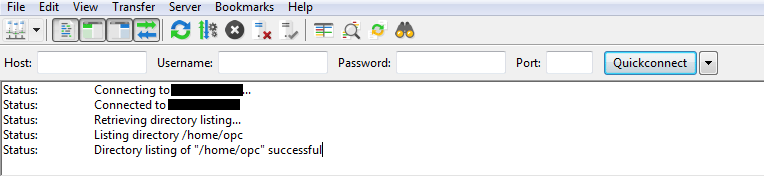
Once that has been completed, you can click connect and the following screen will appear:
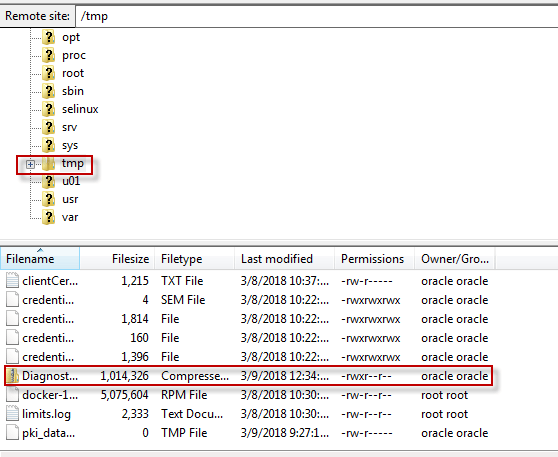
After connecting, the table on the right populates with your service directories. Navigate to the root folder (/) and locate the tmp folder. By clicking on tmp, you can see out Diagnostics zip inside.
Our last step is to right click on the file and select Download.
After following the above steps you now have the Essbase diagnostics file on our local machine. This file can then be attached to your Oracle SR taking you one step closer to getting your services back online.