Need frequent metadata loads to your PBCS, EPBCS, or FCCS application? Don’t break your back, Data Management has you covered to do the heavy lifting!
Metadata loads through Data Management allows creation of base-level members under existing parents while providing the ability to customize and set a standard format for the member names and aliases at the same time. In addition to customizing member names and aliases, Data Management provides the ability to assign basic properties and attribute values to the each member being loaded.
A couple things to keep in mind as you load metadata through Data Management:
- Metadata parameters around character type and number of characters for the member name and alias still applies. This means no more than 80 characters for either the member name or alias, and avoiding the use special characters in the member name.
- If an existing member is reloaded with a new parent assigned to it, the member will move under the new parent and so will its data.
From this point forward, we’re going to walk through an example where I load metadata to the Entity dimension, customize the alias, and assign an attribute to the members.
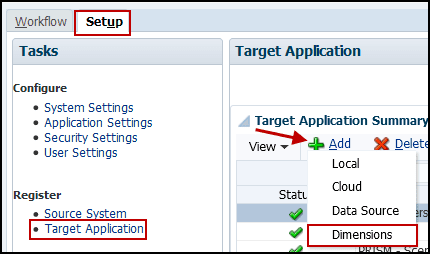
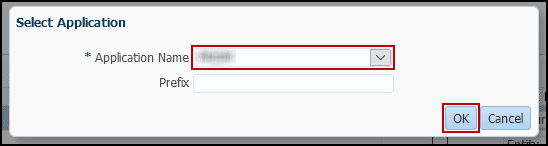
To get started, log-on to your application, and open Data Management. Under the Setup tab, click on Target Application to open the Target Application setup, and register a target application for the dimensions. Within Target Application: click on Add, select Dimensions, select the Application Name, and then OK. This will add Account, Entity, Custom, Scenario, Version, and Smartlist to the Target Application.
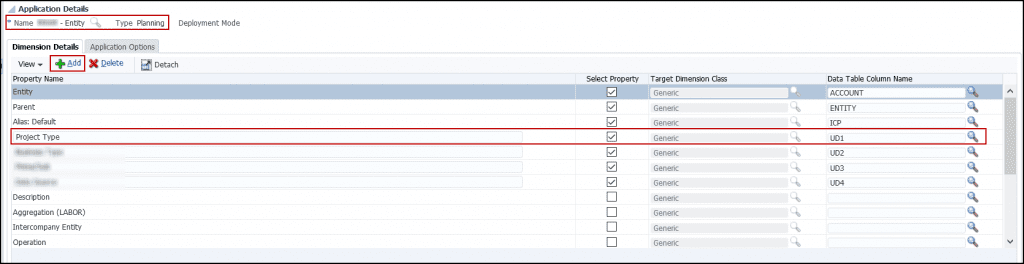
Once the dimensions are added successfully, click on the “AppName – Entity” under the Target Application to view Application Details of the Entity dimension.

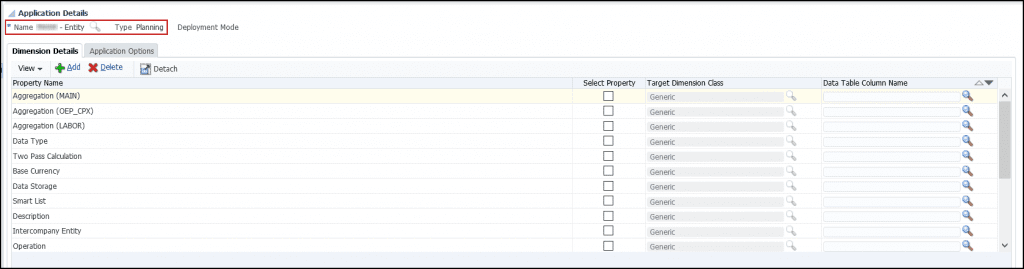
Application Details allows us to select properties to the members being imported from the source file. Some properties are automatically set once you add the dimensions to Target Application (such as the Entity, Parent, and Alias). Other properties can be customized, and new properties can be added as well (such as Attributes).
We’re going to import Entity members and assign a “Project Type” attribute to these members. The member name, alias, parent, Project Type attribute, and other details will all be outlined in the pipe-delimited source file.
Let’s add a new Property Name and give it the same name as the attribute dimension name in the application, which in this case is “Project Type.” Be sure to check-off Select Property to enable assignment of the property from the source file, if this not checked off, a Target for the attribute will not be created in the Import Format. Finally assign a Data Table Column Name (ex UD1).
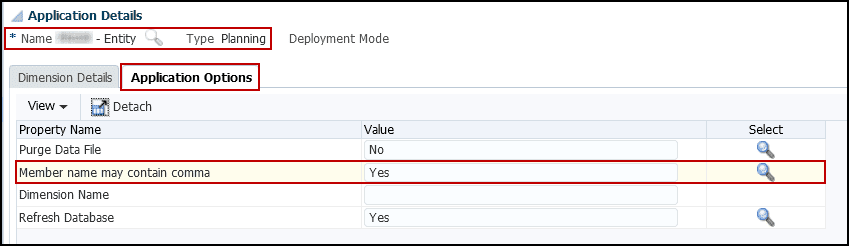
It’s important to remember to update the “Member name may contain comma” option to Yes if any of the member names or aliases contain a comma. If this is not updated, there will be kick outs on export of the load as Data Management will consider the value as two separate fields separated by a comma. This is more significant while using the comma File Delimiter option in the Import Format, however, we have seen cases where even pipe delimited files had kick-outs due to having commas in the alias.
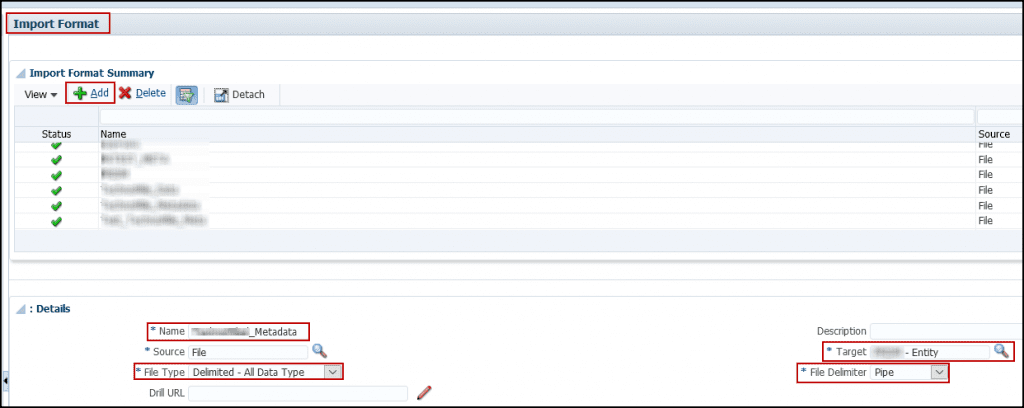
Add a new Import Format and specify the following: Name, File Type, Target (the desired target dimension) and the File Delimiter.
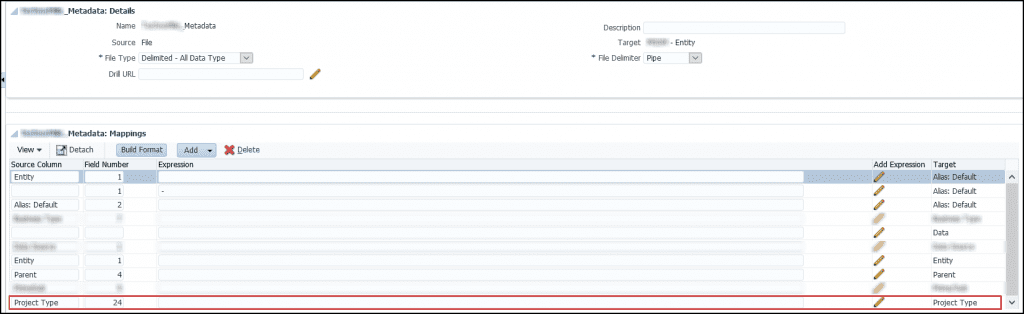
Once the import format is saved, specify the Source Column, Field Number and Expression (optional) in the Mappings section of the Import Format. In the example illustrated; we have three target Aliases to customize the alias as “MemberName-Alias”, with the remaining Source Columns and Field Number mapped to Target accordingly. Since we enabled Select Property for the “Project Type” attribute, it will appear in the Target column to allow a Source Column to be mapped to it. Make the appropriate updates and save.
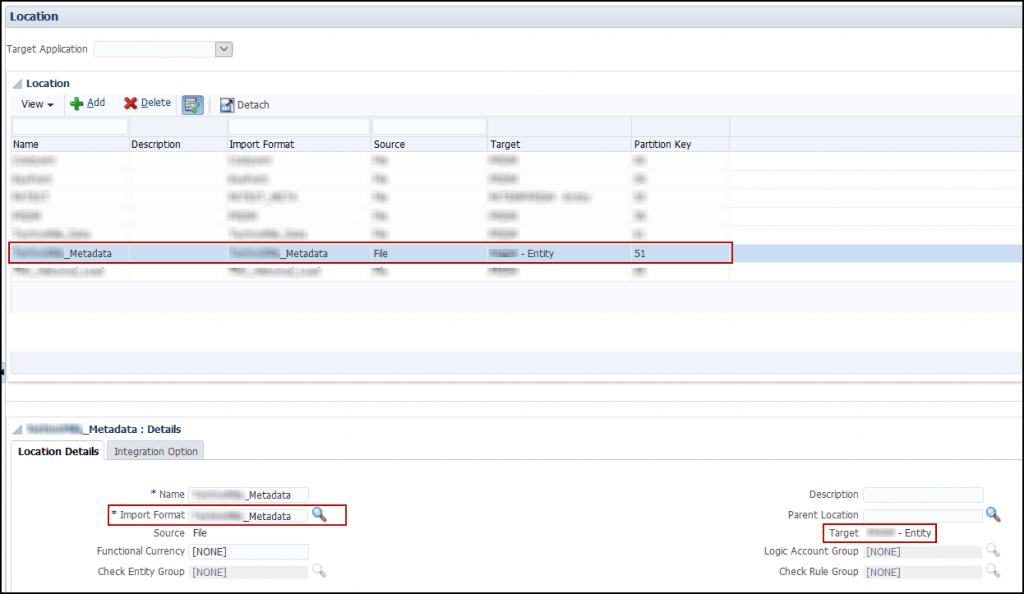
Now we can create a Location, where we specify the Import Format and the Target as “AppName – Entity.” We will utilize this location in Workflow to specify Data Load Mappings, Data Load Rule, and monitor loads in the Data Load Workbench.
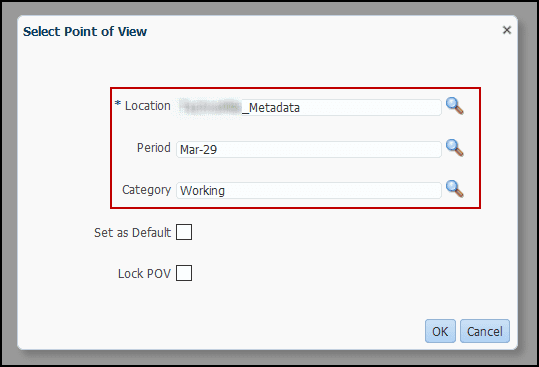
Now that the setup is complete, we can move on to Workflow; Update the point of view to the Location we created above, and the Period and Category. The Period and Category is not as significant, since we’re performing a metadata load, and metadata is loaded to the application dimension and not a specific POV intersection. However if you are loading any Smart List values along with metadata, the Category is needed since the Smart List assignment will load at the specified POV.
Add a new Data Load Rule in which we’ll specify a Name, Category, Import Format, and File Name.
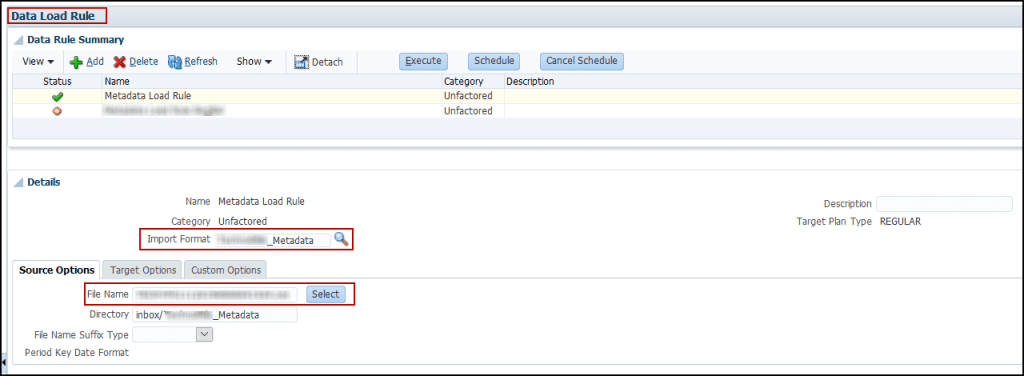
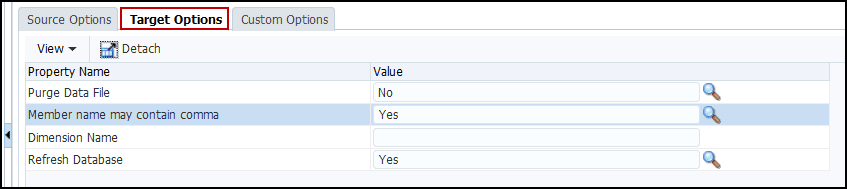
Once again, if a member name or alias may contain commas, go ahead to Target Options, and set the “Member name may contain comma” option to Yes. We don’t specify Dimension name, as the metadata is loading to the same dimension the Location has been set to.
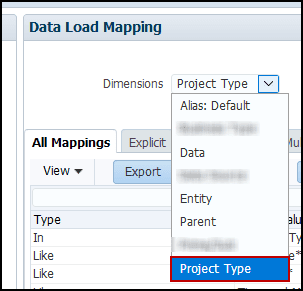
Specify the Data Load Mappings for the metadata load. While going through this process, you’ll specify mappings for each item list in the “Dimensions” drop down, this includes the attribute dimension (“Project Type”) we specified in the Application Details (under Target Application).
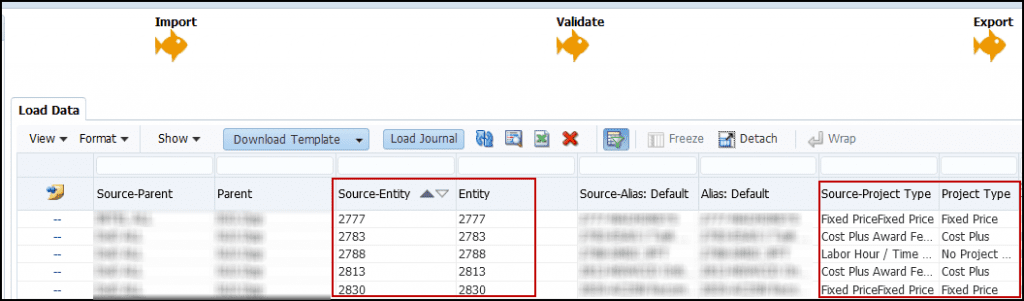
Once Mappings are specified, process the load in the Data Load Work Bench. Each item specified in the mappings must show source column and the target.
Once the Export is successful; open the Entity dimension in Smart View’s dimension editor, set the desired properties (parent and attribute most importantly), list out the entities, and refresh the worksheet to update the entities’ details. As shown below, the entity members were created under their coordinating parent, and assigned the Attribute (“Project Type”) are assigned as well.

We have found this functionality in Data Management to be a user-friendly option to automate metadata loads, which used to be relegated to far more complex ETL tools. It becomes especially useful when dimension attributes are ever changing and need to be updated based on values in their respective source systems. Considering the setup is relatively simple, give it a try and see if it can help make your monthly/daily metadata updates more efficient!
Want to learn more about data managament? Please reach out to us today.