Since the infancy of Oracle’s Financial Consolidation and Close Cloud Service (FCCS), many of Oracle’s current/potential customers have been looking for parity between this cloud offering and its on-premise predecessor – Hyperion Financial Management (HFM). While true parity may not exist just yet, Oracle is putting significant investment to push out major updates to continually enhance their products functionality. As evidence, just this past December Oracle released a long-awaited feature called Manage Ownership which is aimed at further simplifying/automating an organization’s consolidation process.
This new functionality allows for easier management of global consolidation settings within the entity hierarchy on a selectable Scenario, Year, and Period basis. As a result, users can change the consolidation percentage for any Entity parent/child combination. Considering that many companies have various subsidiaries/entities that are not fully consolidated into the overall company, this functionality is a great way to better manage and ensure that they are correctly consolidated based on their business structure.
This blog will provide an overview of enabling Manage Ownership in FCCS and entering ownership percentages for entities in a given Scenario, Year, and Period of the application. Furthermore, it will show how to properly recalculate the ownership data once changes have been made. Finally, the blog will address issues that you may encounter and should keep on your radar when implementing this functionality.
Enabling the Manage Ownership Functionality
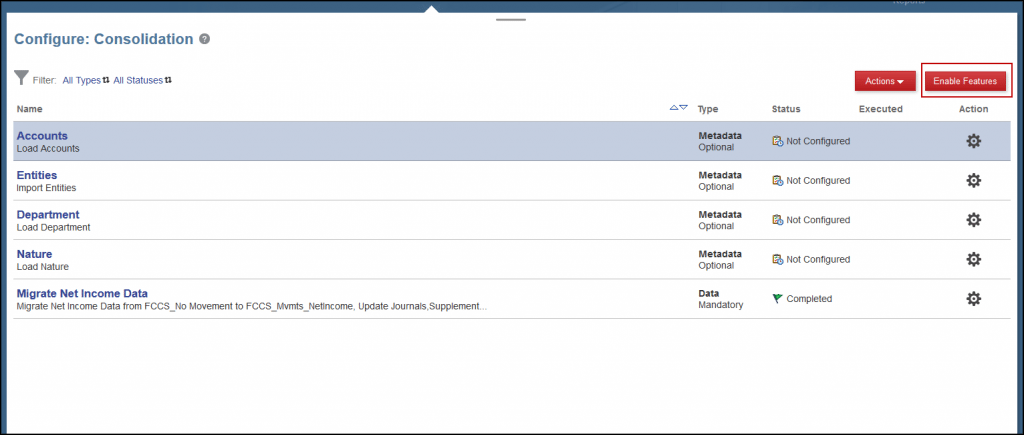
First, let’s start on the home screen of the FCCS application where we will show how to enable the Manage Ownership functionality. Click on the Navigator button in the top left corner of the home screen, and then select Configuration.

Then click on the Enable Features button in the top right corner.
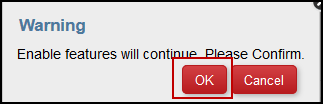
Check the box next to Ownership Management, then hit the Enable button in the top right corner. Finally, hit OK to confirm the change.

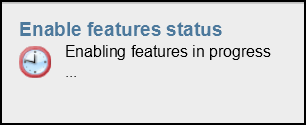
Please note that it may take a while for the feature changes to be made and it will occasionally get stuck on the loading screen (as seen below). When this occurs, simply refresh the page and the feature will be enabled.
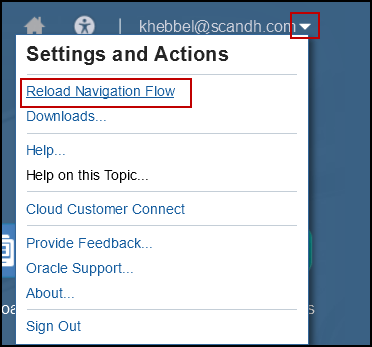
Finally, go back to the home screen and select the drop down next to the username in the top right corner. Then click Reload Navigation Flow for the changes to be added to the FCCS application.
Using the Manage Ownership Functionality
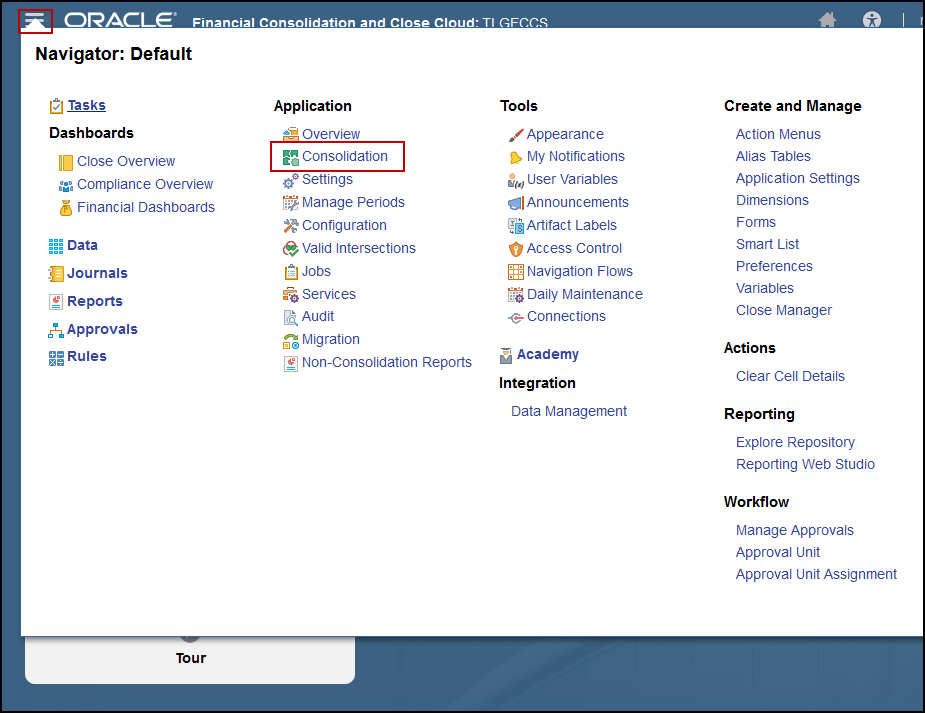
Once the Navigation Flow has been reloaded, Manage Ownership can be accessed within Consolidation.
Now that Manage Ownership has been enabled and we have accessed it, we can make updates to the appropriate entities as needed. To change the ownership percentage of any entity, simply select the percentage field that is going to be changed and enter in the correct number. When changing ownership percentages for any entity please use the following tips:
- After changing a percentage for an entity, FCCS with automatically update the Control, Consolidation Method, Consolidation Percentage and Minority Interest Percentage (All of these are dependent on what ownership percentage is entered into the field for the entity).
- The Consolidation Method and Control setting can be manually changed if needed.
- If both the child and parent percentages are changed then they will be multiplied together when consolidated. (i.e. If Parent 1 is 50%, and Child1 is 80%. When fully consolidated 40% of the child would be consolidated into Entity).
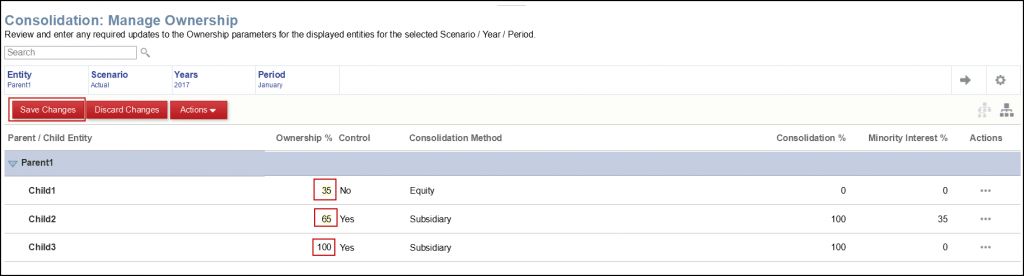
Next, we are going to change Child1 to 35%, Child2 to 65%, and keep Child3 at 100%. Once the percentages have been changed, click on the Save Changes button at the top.
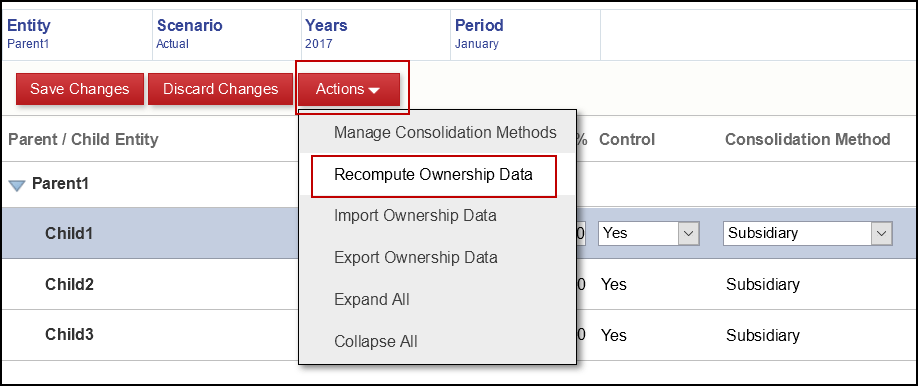
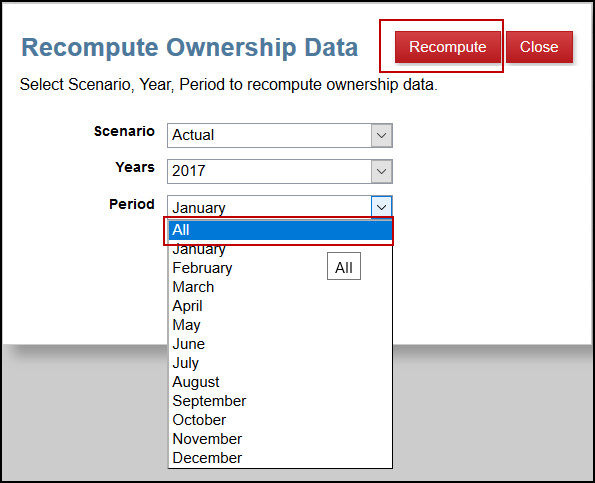
To apply the changes and see the effect on the data within the application, the ownership data must be recalculated using the new percentages. In order to do this, click on the red Actions drop down and then select Recompute Ownership Data.
The application will prompt you to choose which Scenario, Years, and Period that will be recalculated. If changes were made across multiple periods, then select the All option by clicking on the drop down arrow next to period. Finally, click Recompute and refresh the database.
Running a Consolidation and Viewing the Data
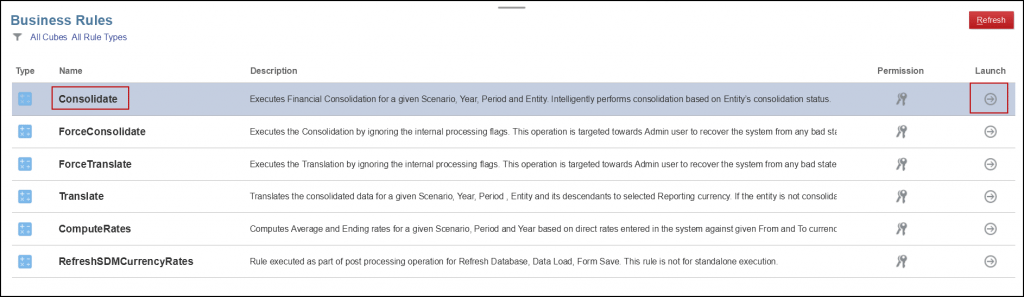
Once the Ownership Data has been entered and recomputed, a consolidation rule must be run in order for the computed data to be available. To run the consolidation rule, go back to the home page and click on the Navigator button and select Rules.

Click on the launch icon for the Consolidate row.
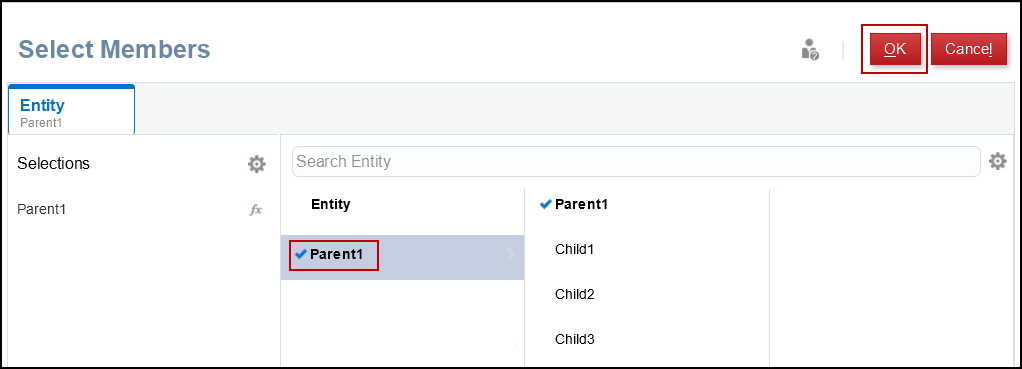
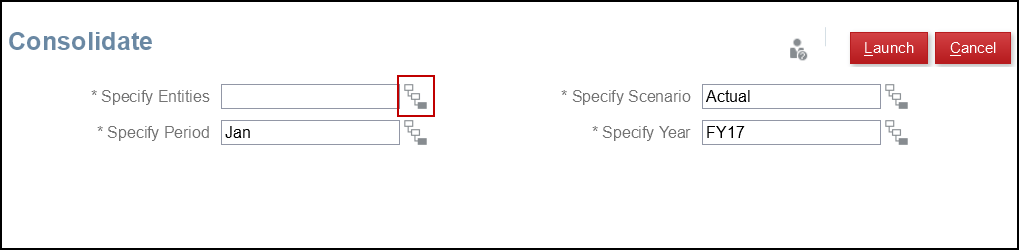
Now, select the appropriate POV for the consolidation to impact. We will be using the same POV that we used when we changed the Ownership Data (January, Actual, FY17).

In order to check the status of a consolidation, go to Jobs in the Navigator to view pending or in-process jobs (e.g. Consolidate).


Additional Tips & Tricks
Aside from the standard process to enable and utilize Manage Ownership, we ran into some common hiccups which are noted below and how we were able to work around them:
- Sometimes when selecting a different month or year within Manage Ownership, the following message may appear. To resolve the issue, simply Recompute the ownership data for the given month and year.

- Often when running consolidations, an error message will appear that states the previous year’s data must be consolidated first. Simply run a consolidation for the previous year and select December to consolidate the whole year. Now, the current year can be properly consolidated.
If you have any questions or are having trouble, we’d love to hear from you. You can reach out to one of our Business Architechs here. We’d be more than happy to see how we can help.