Authored by Sarah Reter, CPA | Controller, Accounting Solutions
Whether you’re a pro or just getting started, these six tips will help you make the most of your Sage Intacct setup.
- How to Update Your Preferences
- How to Use Wildcards When Searching Accounts
- How to Use the “Manage your View” Function
- How to Show Details in General Ledger Reports and Export General Ledger to CSV
- How to Maximize Sage Intacct’s Dimension Reporting
- How to Automatically Recognize Revenue Schedules
#1: How to Update Your Preferences
This is a simple but handy trick! If you’re new to Sage Intacct, setting up your preferences is one of the first steps I’d recommend. Intacct defaults to 20 items per page, which means you’ll end up toggling between pages. Updating the records and rows per page allows you to see more of your data in a single view and reduces the need to toggle between screens. I’m sharing the unique preferences I set up for all my clients below.
#2: How to Use Wildcards When Searching Accounts
Wild cards are a handy feature in Sage Intacct that allows you to search for information when you’re unsure about the exact name or details. By entering the “%” symbol before typing your search, you can easily pull up relevant data related to specific keywords.
For example, if you want to look up a Dunder Mifflin bill but you don’t know how the vendor was set up in Intacct, use the search %Dunder, and any vendor with Dunder in the name will populate.
I’ll demonstrate how to use this feature and provide examples of how it can be applied in both accounts payable and accounts receivable below.
#3: How to Use the “Manage your View” Function
Sage Intacct defaults to basic views that are not always ideal for your needs. The “Manage Your View” function allows you to customize your view in any of the modules, giving you better visibility of the information you want to see.
I like to bring in Description and Message text and the Date fully paid for AR invoices. To update your view:
- Under Invoices – select Manage Views > Create new view
- Select the customized view that you’re looking for and follow the steps to save this new view.
- Save your new view as something that distinguishes it and select Deploy.
Once your new view is saved, it will be available as a drop-down option. All of the users on your console will be able to utilize this view. Once you set your preferences, this will be your default view.
#4: How to Show Details in General Ledger Reports and Export General Ledger to CSV
General ledger reports are an accountant’s best friend! However, Sage Intacct’s default settings don’t show the most useful information; the default view is to display “Show transaction presentation” under Summary. Change this to Details to see the subledger posting detail. You’ll also want to show the Bill, Invoice, or adjustment number. The reference number is a system-generated number that has zero significance.
Another time-saver that Sage Intacct offers for General Ledger (GL) reports is the ability to export the GL to CSV and include the account number on each line. This feature, which Quickbooks doesn’t offer, is incredibly useful when you’re doing lookups or filtering by transaction level detail. All you need to do is select “Include account on each line for CSV export” when exporting.
*Note that this option only works when exporting to CSV.
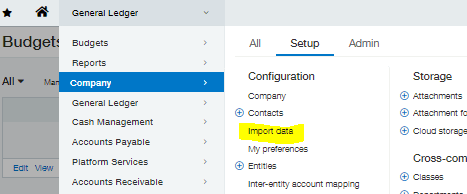
Using import templates for budgeting is another way to save time when working with general ledger reports! Once you have the template created, save it under “Import Data” (see below). This is also super helpful when you have a salary allocation journal entry.
#5: How to Maximize Sage Intacct’s Dimension Reporting
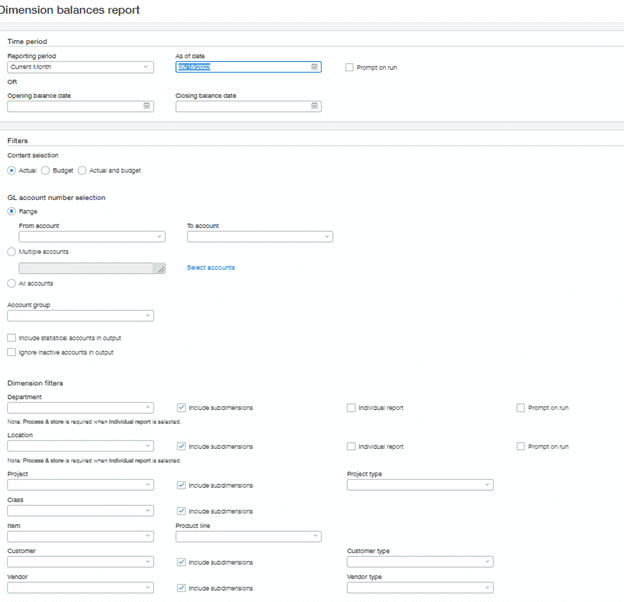
One of Sage Intacct’s greatest differentiators from other accounting software options is its robust dimension reporting ability. Sage Intacct’s highly customizable Dimensions Balances report allows you to filter and segment your information by any dimension. I like to use this for my prepaid and deferred revenue schedules. In an example shown in the video below, I broke out our Prepaid balance by department and project.
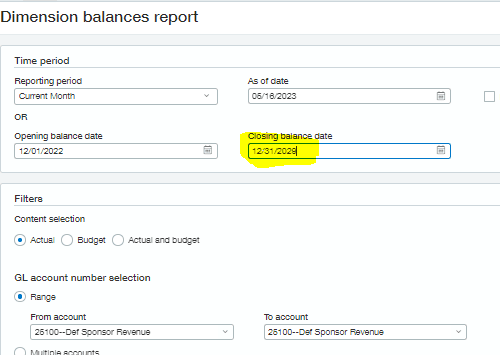
Dimension Balance reports also allow you to check if your deferred revenue runoff is posting correctly. You can create a dimension report for a period in the future, where all the revenue should be recognized by that point. This can identify any missing journal entries or “unusual items.” I use this report as part of my month-end review for Revenue.
These reports have a variety of filters to show specific datasets, such as displaying the P&L results for just one department or project.
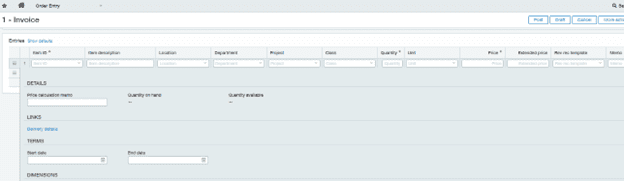
#6: How to Automatically Recognize Revenue Schedules
You can optimize your revenue schedules to automatically recognize revenue at the time of order entry. This is set up under “Order Entry – Invoicing for Customers.” This incredibly helpful feature ensures that individual transactions are initially posted to deferred and automatically recognized into revenue by customer, without losing source data. I have found this setup to be much more efficient than other accounting systems.
While these six tips lay the groundwork for improved Sage Intacct productivity, imagine the potential when customized to your business’s unique needs. SC&H’s accounting experts can customize your Sage Intacct setup to align with your goals and revolutionize your financial processes. Contact us today to get started.