Tired of users complaining about wanting their data faster? Tired of relying on scheduling to move data between your cubes? Well, a new component in EPBCS/PBCS eliminates these problems with the push of a button. Smart Push gives end-users the power to instantly move data to another cube at their convenience. In this blog, we will walk through what a Smart Push does, how to set up a Smart Push, and some things to consider when using Smart Push. In other words, we will teach you how to Smart Push it, push it real good!
What is a Smart Push?
Smart Push is a function within EPBCS/PBCS that allows on-demand movement of small sets of data (including comments, attachments, and supporting details) from one cube to another within the same application. For EPBCS users, you will notice that this concept is used heavily to transfer data elements between the out-of-the-box modules – and for good reason. Considering that many applications are global deployments or require real-time reporting, it is typical for users to request data movements between cubes at all hours of the day for analysis. Sure, you can schedule automated exports/imports between cubes throughout the day, but sometimes it is unrealistic to expect users to wait 30 minutes for a change to make its way to a reporting cube for review. And, when working with a global user base, requests for immediate data movements can come at all times of day or night. This is where Smart Push can help. This blog will walk through a use case in which users enter Forecast data in a BSO cube and need to pull reports from an ASO cube immediately afterwards. The following steps illustrate how to configure a Smart Push by creating a Data Map, attaching it to a web form, and ultimately move data between two cubes.
[sch_pullbox]Learn more: Let’s Talk FP&A – Strategic Whiteboard Series on Financial Planning & Analysis[/sch_pullbox]
Smart Push Configuration
We’ll start at the home screen of our PBCS application. The first step in creating a Smart Push is building a Data Map.
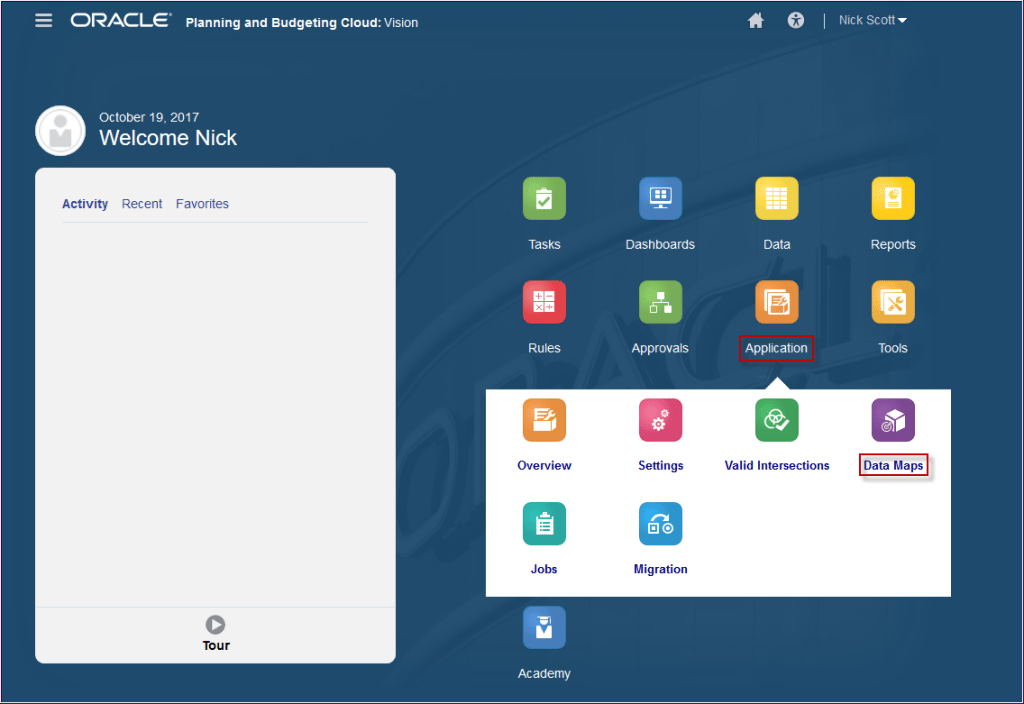
To create a new Data Map, select the Create button on the Data Maps screen.

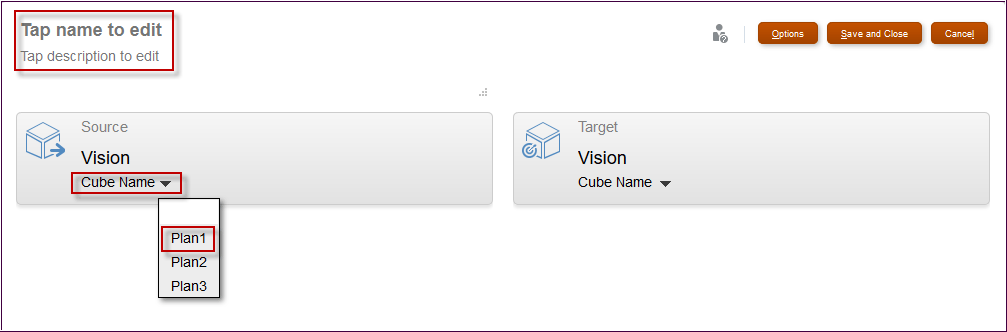
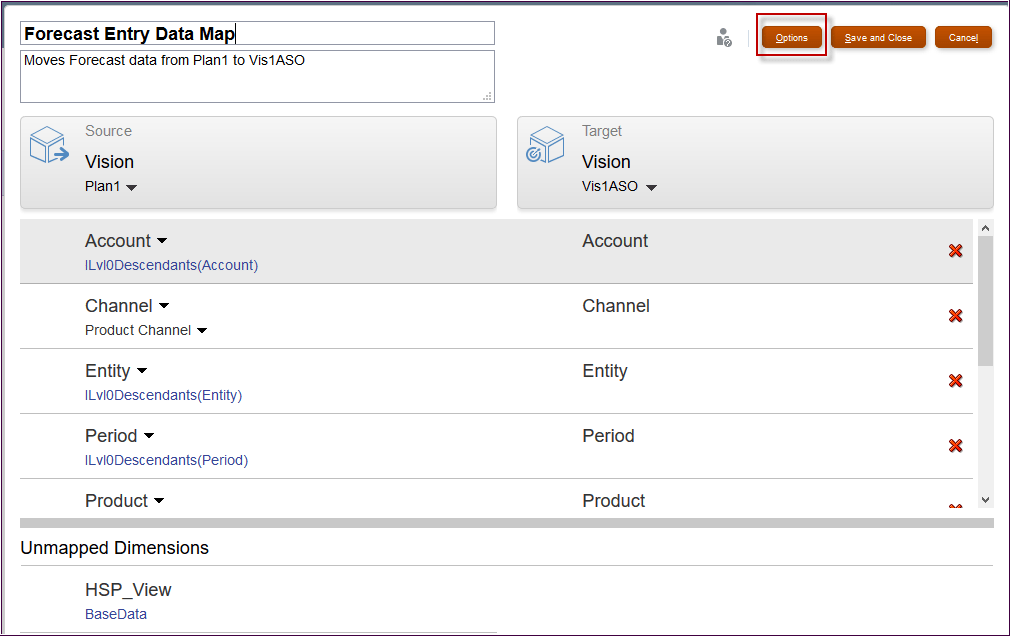
Next, we’ll need to name the Data Map, add a description (optional), and select a Source cube from the Cube Name drop-down. Our Source cube will be Plan1 because this is where the users are entering their Forecast data.
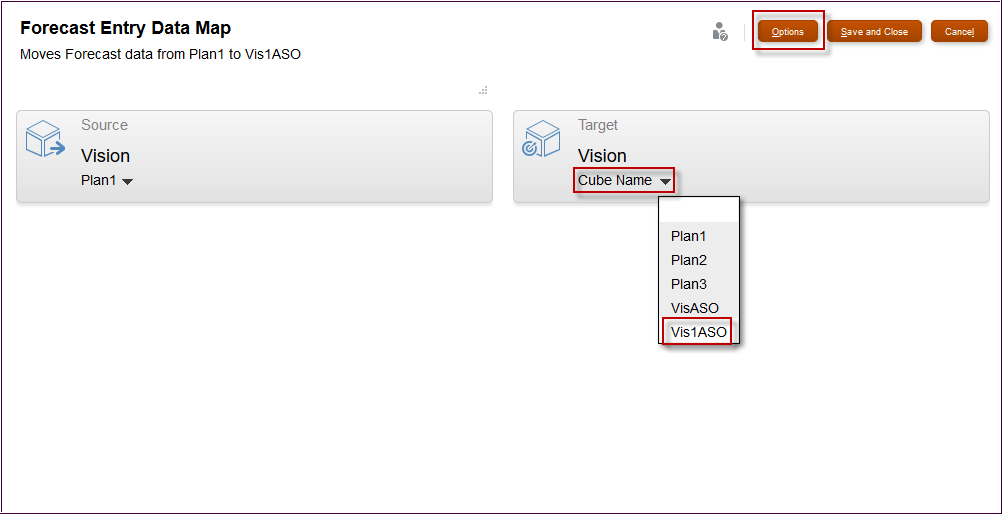
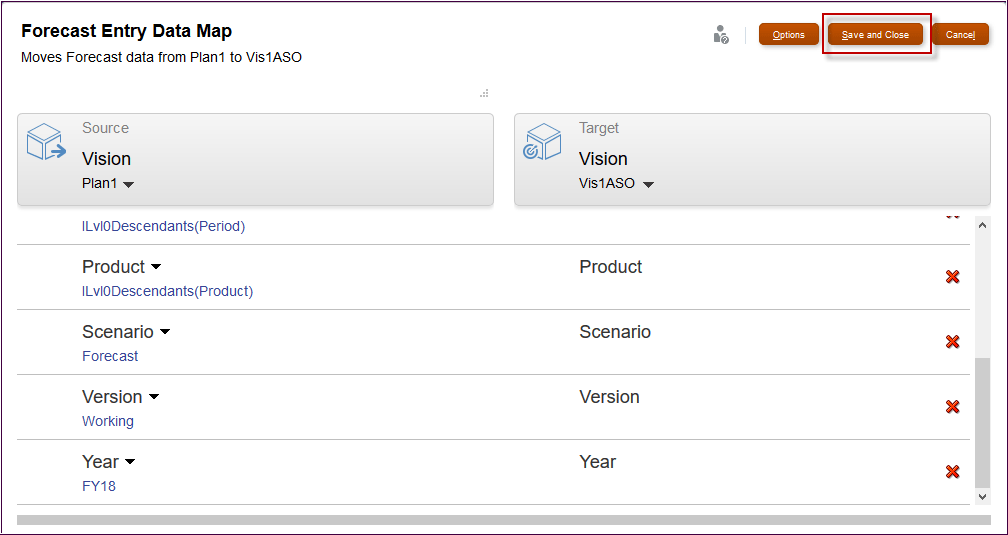
Next we’ll select our Target cube, which will be our Reporting Cube, Vis1ASO.
The Data Map Options allow you to select whether comments or supporting detail move to the Target cube when the Smart Push is executed. Keep in mind that Smart Push can only move comments, attachments, and supporting detail from a BSO cube to another BSO cube, and not from BSO to ASO. So in our example we will leave those boxes unchecked.

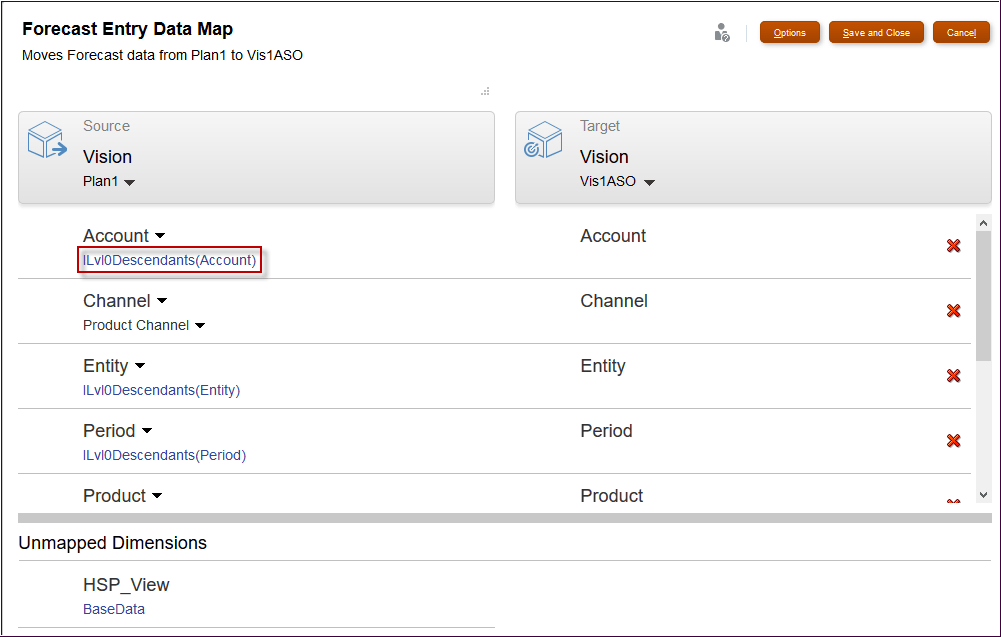
By default each dimension is set to move all of its level zero members. You can update the selections within the Data Map definition as shown below, or you can choose which members to move within the web form definition (we will come back to this later on). The example below illustrates how to change the default selection for the Account dimension. Begin by clicking on the default member to open a member selection screen.
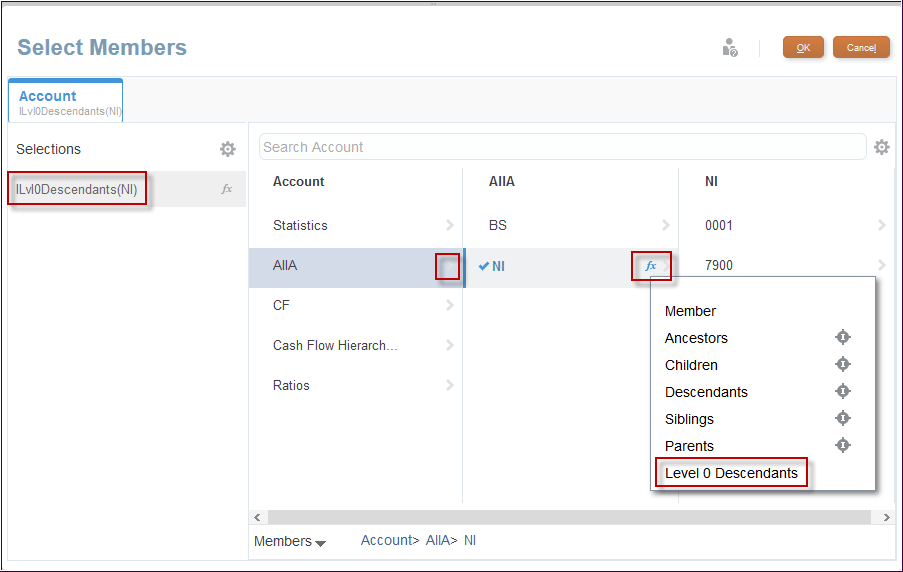
Search or navigate through the members to find the desired Account. Once you find the Account, you can select the fx (function button) to the right of the member name to display a menu of member functions. For our example, we will pull Level 0 Descendants of NI.
The Unmapped Dimensions section at the bottom of the Data Maps screen holds any dimensions that are valid in the Source cube but not in the Target cube (or vice versa). In our example, the HSP_View dimension is valid in Plan1 (source cube), but not in Vis1ASO (target cube). You can select which HSP_View member (or members) to pull data from in the source plan type in the Unmapped Dimensions section. If you choose multiple members, that detail will be lost in the target plan type since the dimension does not exist.
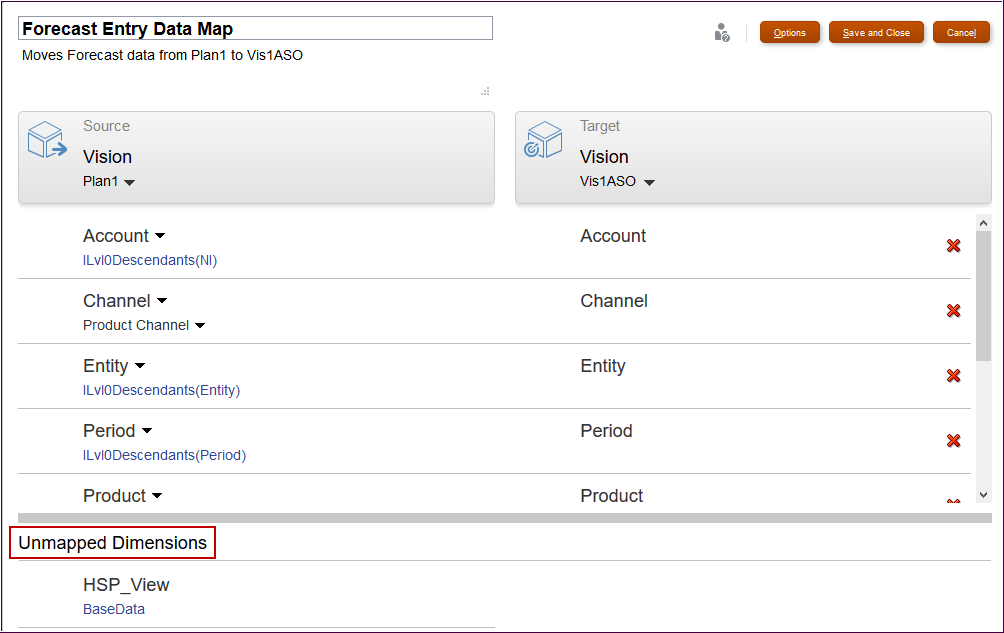
Click Save and Close to finalize the Data Map selections. You do not need to refresh the database after making updates to a Data Map.
Attaching a Data Map to a Web Form
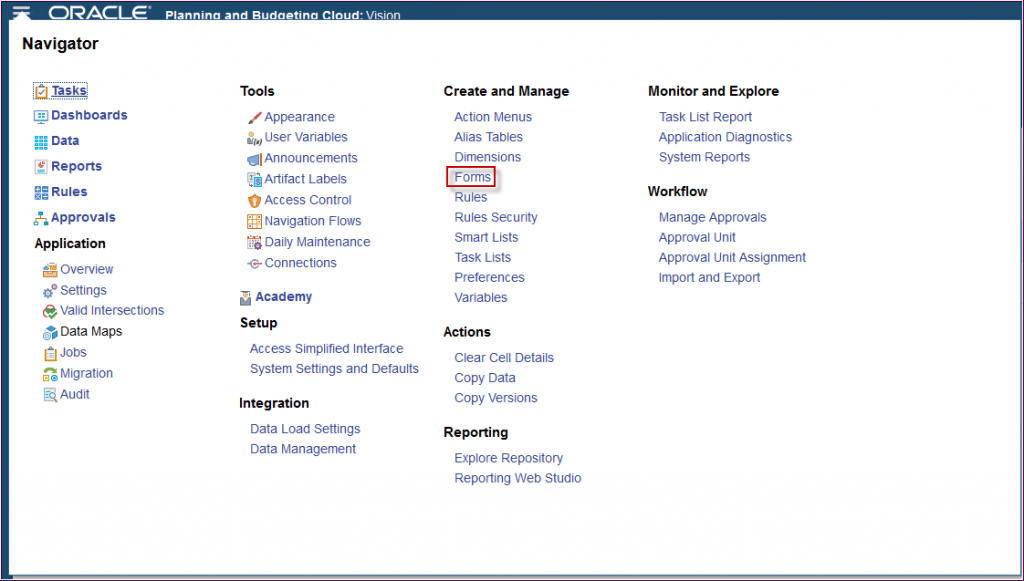
Once our Data Map is set up, we can attach it to the web form where users are submitting data. Select the Navigator and click on the Forms link.
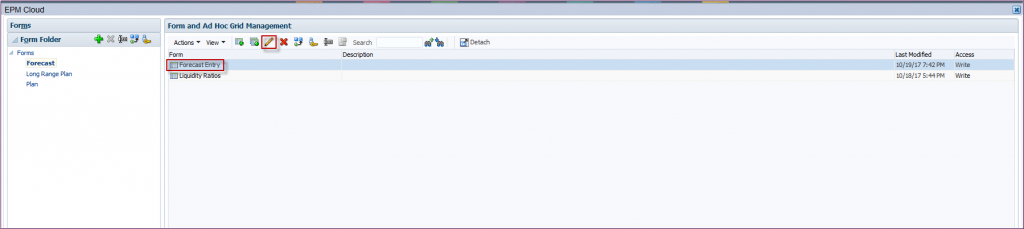
We will be attaching our Data Map to our Forecast Entry web form. Click on the pencil icon to edit the web form.
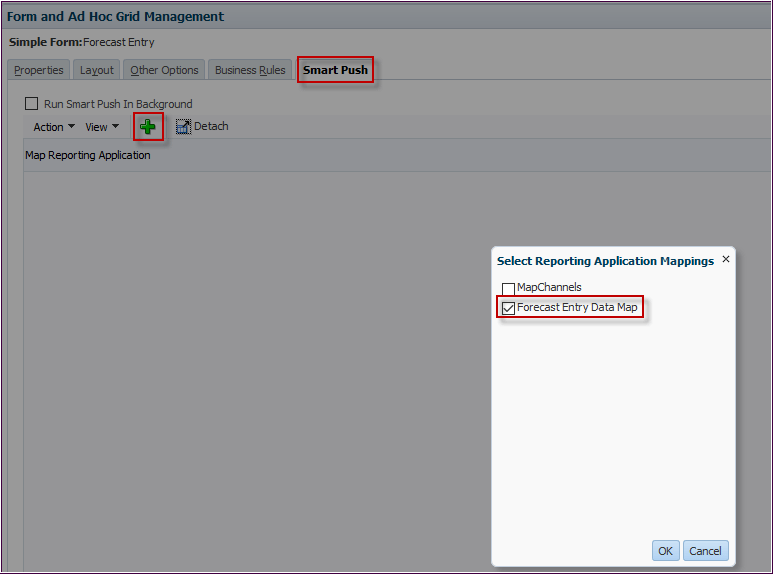
Navigate over to the Smart Push tab, and click on the green + to attach a Data Map to the form. We will select the Data Map that we just created, Forecast Entry Data Map, and click OK.
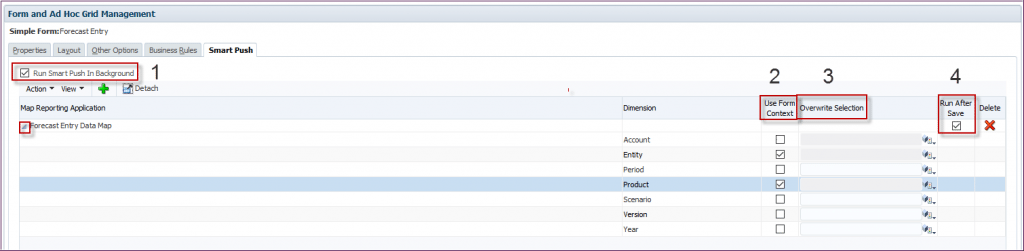
Once the Smart Push has been added to the web form, there are a few additional configuration steps (labeled 1 through 4 below) to complete in order to ensure the “Push” in Smart Push does what it’s meant to do. Click the arrow to the left of the Smart Push name to expand the Smart Push and make the desired configuration selections for each dimension.
- “Run Smart Push in Background” – Allows the user to continue using the application while the Smart Push runs in the background.
- “Use Form Context” – Overrides the dimension members selected in the Data Map definition and replaces them with the members listed on the form. In our form, we have marked Use Form Context for the Entity and Product dimensions, because this is selectable in the form POV. For example, when a user submits data to a Product selected in the POV, the Smart Push will only move the data for that Product. This makes the Smart Push more efficient by only moving specific subsets of data and it allows a single Data Map to be used on multiple web forms, reducing overall maintenance.
- “Overwrite Selection” – If Use Form Context is not selected and this field is left blank, the Smart Push will run on the members defined in the Data Map. If you want the Smart Push to move data for a member (or members) that is neither on the form nor in the Data Map definition, simply add the member(s) to this field. The Smart Push would only move the member(s) specified in the field.
- “Run After Save” – Executes the Smart Push when the user submits data to the web form. If there are any business rules on the web form, the Smart Push will execute after all the business rules complete.
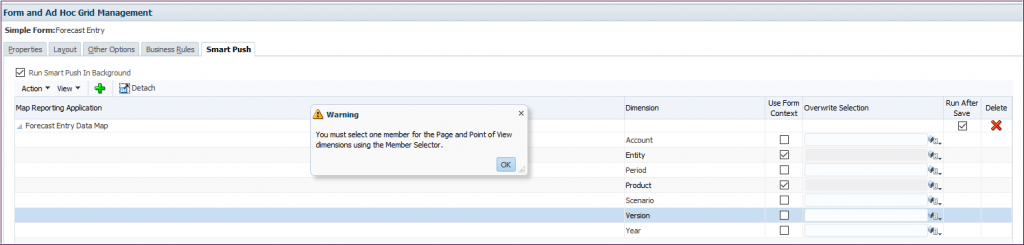
Note: If Use Form Context is not checked and Overwrite Selection is left blank, PBCS will display an error message.
Summary and Additional Considerations
As you can see creating a Smart Push is a fairly straight-forward process. It gives end-users the ability to instantly move their data to a different cube in the application, whether for reporting or additional planning processes, without burdening an application administrator. The functionality of Data Maps can also be run independently of web forms either as a scheduled job in the web or via EPM Automate, much like the old “EPMA Data Sync” functionality from the on-prem world.
Below is a list of some of the limitations to keep in mind when using Smart Push:
- A Data Map can only be attached to a web form from its source plan type.
- Smart Push is meant to move small subsets of data and currently has a limit of 250,000 cells. If you attempt to move more than that amount, Smart Push will error out and not execute successfully (Oracle is actively working on increasing this cell limit).
- Smart Push source plan types must be a BSO plan type.
- Smart Push can only move comments, attachments, and supporting details to a BSO plan type.
- At least one of the dense dimensions (either Account or Period) must be set as a dimension-to-dimension mapping in the data map definition.
Be sure to check back in with us as we explore more advanced Smart Push functionalities, such as mapping unmapped dimensions and configuring Smart Push on a composite form.
If you have any questions or are having trouble, we’d love to hear from you. You can reach out to one of our Business Architechs here. We’d be more than happy to see how we can help.